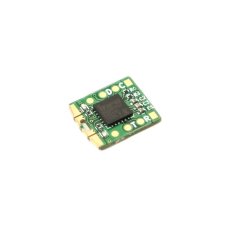
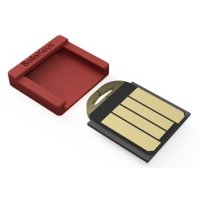
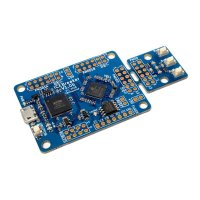
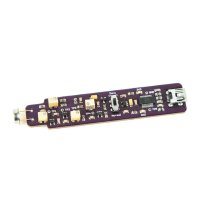
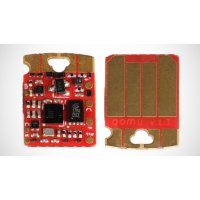
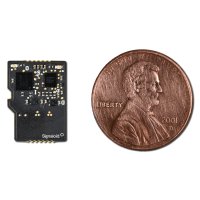
There are many U2F tokens available, each focusing on its own selection of features. Most come with one button and one LED.
|
|
Tomu
|
YubiKey NEO
|
YubiKey Nano
|
VASCO SecureClick
|
|
NFC
|
No
|
Yes
|
No
|
No
|
|
Bluetooth
|
No
|
No
|
No
|
Yes
|
|
Open source
|
Yes
|
No
|
No
|
No
|
|
Fits in USB port
|
Yes
|
No
|
Yes
|
No
|
|
Custom Software
|
Yes
|
No
|
No
|
No
|
|
Number of Buttons
|
2
|
1
|
1
|
1
|
|
Number of LEDs
|
2
|
1
|
1
|
1
|
Manufacturing Plan
Kosagi will manufacture Tomu in China.
We have already run several boards through the process to ensure the factory is able to produce boards.
We will start by sending them Gerber files generated by KiCad, along with a Bill of Materials that lists all twelve of the components needed for Tomu. Some of these components, like resistors and capacitors, are “jellybean” components and can be easily replaced by cheap, locally-sourced equivalents. Others, such as the EFM32HG309 CPU, must come from a reliable source. The factory will gather these components, as well as place an order with a separate factory that makes PCBs. All of these pieces will come together in the factory’s warehouse.
Next, the factory will “run SMT,” in which solder paste is applied to the PCB, components placed on the board, the entire PCB assembly (PCBA) is run through a hot oven to melt the solder, a factory test is run on the finished product, and the boards are finally packaged for shipping. If all of the pieces are ready, this process should be relatively quick.
The overall design is very small, which means the design benefits from panelization – a technique where a small PCB design is duplicated several times to produce a bigger PCB that is easier to run through an assembly line. Every factory has their own preferred PCB size, so we’ll let the factory do the panelization. They will program the machines to put components on the panels, and will break off individual pieces (called depanelization) as part of the manufacturing process, prior to programming and testing.
The printed circuit board itself is two layers, which is relatively simple to manufacture. However, things get a little bit tricky because it needs to fit in a USB slot. Most standard PCBs are 1.6 mm thick. The main CPU on Tomu is an additional 0.8 mm thick, which means the overall thickness is at least 2.4 mm. The maximum size of a USB connector is 2.5 mm, but that includes retention pins. Plus, we don’t want the metal housing to short against the PCB. The solution is to make the PCB thinner and use a molded case of some sort.
We will manufacture the PCB to be 0.6 mm thick, leaving an extra 1 mm of space to play with. This works well, because most case manufacturing technologies work with tolerances of 1 mm. One downside to thin PCBs is they don’t have as much mass, and are prone to bouncing right off the assembly line when the components are placed on them at high speeds. To get around this problem, we use PCB carriers.
PCB carriers are CNC-milled pieces of dense plastic custom-fitted to the panelized layout. They prevent the PCB from sliding around as it goes through the conveyor belt that ties the assembly line machines together. The PCB carrier must also be able to withstand the heat of the reflow oven at the end of the line that melts the solder and causes all the components to stick together. This carrier can be reused, so after it is sent down the factory line it is brought back to the start to be reused.
We have produced test boards at 0.6 mm thickness and verified the process works. We have produced 3D-printed cases that can be used with these boards, so we know the mechanical aspect works as well.
Tomu Enclosure
Tomu fits entirely enside your USB port. Most USB products either use a USB connector from a manufacturer, or make the PCB thick enough that they don’t need a connector. Tomu can’t take either of these approaches, because the components must all go on the side of the circuit board opposite the USB contacts, and things like chips and capacitors and resistors tend to be different heights.
Early Tomu units were developed by wedging some paper in between the CPU of Tomu and the USB port to keep good contact between the computer and Tomu. Next, a small rectangular piece was developed that can be 3D-printed and wedged in between the CPU of Tomu and the USB port. This was more reliable, but still not permanent.
More recently, a form-fitting case was developed. This case is shaped such that it wraps around the CPU and takes advantage of mechanical guidance slots that have been made in the PCB. Future revisions will be made to the PCB to allow for form-fitting cases to be printed on common FDM-style printers.
Now that we’ve met the stretch goal, we will manufacture a plastic case to ship with each and every Tomu we build. This case will be transparent, to allow you to see the LEDs. It will sit on top of the Tomu board, and have a peg that will be used both for alignment and for securing the board. We’ll work with a plastics supplier to ensure the case fits securely around Tomu and inside a USB port, with the option to permanently mount Tomu inside the case.
Risks & Challenges
Hardware is hard. It’s in the name. There’s a 99% chance any given piece in the hardware chain will go right, but, with thousands of parts to coordinate, things will invariably go wrong. We will do everything we can to minimize things going wrong.
We have already produced several test boards to vet both the design and the factory processes. For example, we know that the circuit board assembly requires PCB carriers. We also know that the circuit itself works, and the hardware design is simple enough to assemble and fix.
The largest challenge for this product is balancing flexibility and user experience. Other products are very simple: press a button and get a signature. Tomu allows for arbitrary code execution, which is not secure at all. By allowing end users to load their own code, we give users the ability to lock their own devices and ensure their keys do not escape their own Tomu board.
The biggest risk is sourcing components. The world is undergoing a shortage of raw silicon wafers, and chips as a whole are becoming more difficult to source. Every component on Tomu can be replaced by a locally-sourced alternative, with one exception: the EFM32HG309 microcontroller must come from SiLabs. If it is unavailable, then the product simply can’t be manufactured. The entire project depends on the availability of this part. If we need to wait for more to be manufactured, then that could delay the entire project.
By carefully considering the software requirements and keeping an eye on worldwide part inventories, we aim to mitigate the risks and address the challenges we foresee.
Stretch Goals
There’s a lot to do, but if enough people back us we can do even more! Both stretch goals have been met, and work has begun to deliver them.
Bootloader
Right now, Tomu uses a bootloader from the chip manufacturer called
AN0042. This bootloader requires drivers on Windows, is sometimes addressed by ModemManager in Linux, and requires root access to use on macOS.
We would like a bootloader that gets out of the way and lets you run your normal application without needing to short out the C pin every time. We’d also like not to require drivers, or superuser access, or have to deal with other programs thinking Tomu is a GPS or modem (unless it’s behaving like one.) These are all shortcomings that the current bootloader suffers from.
Plastic Case
Tomu is tiny, and fits entirely inside your USB port. USB ports have metal shields around them, so Tomu requires a case both to fit snugly inside the port and to protect the components from shorting out against the shield.
The current solution is to 3D print your own case. However, with enough backers, we can afford to produce an injection-molded plastic case to include with every Tomu purchased. At $2000, the cost to cut steel becomes affordable and we can ship a small plastic case with every Tomu unit.

