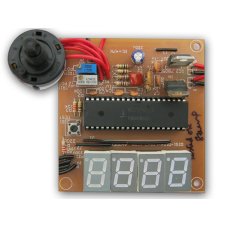
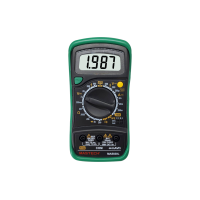
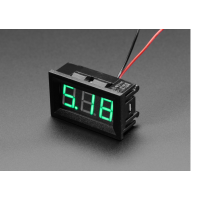
A voltmeter finds application wherever voltage is to be measured. The Digital Voltmeter is designed as a panel meter and can be used in DC power supplies panels or where it is necessary to have an accurate indication of the voltage. Count of ICs used is 3.
The heart of the Digital Voltmeter circuit is an analogue-to-digital converter IC i.e. the ICL7107. This IC incorporates in a 40-pin case all the circuitry necessary to convert an analogue signal into digital and can drive a series of four seven-segment LED displays directly. The circuits built into the IC are an analogue-to-digital converter (ADC), a comparator, a clock, a decoder and a seven-segment LED display driver.
The circuit can display any DC voltage in the range of -1999 volts to +1999 volts. It operates off ±5 volts.
The operation of the circuit is described in two stages. During the first stage, for a given period the input voltage is integrated, and the output of the integrator at the end of this period is a voltage which is directly proportional to the input voltage. At the end of the preset period, the integrator is fed with an internal reference voltage and the output of the circuit is gradually reduced until it reaches the level of the zero reference voltage. This second phase is known as the negative slope period and its duration depends on the output of the integrator in the first period. As the duration of the first operation is fixed and the length of the second is variable, it is possible to compare the two and this way the input voltage is in fact compared to the internal reference voltage and the result is coded and sent to the display.
Basically, the voltage to be measured is applied across points ‘IN-L’ and ‘IN-H’ of pins 30 and 31 of IC1, respectively, through circuit resistors R5, R6, R7 or R8 and preset VR1. Resistor R2 together with C5 forms the RC circuit used to set the frequency of the oscillator (clock), which is set at 48 kHz approximately. At this clock rate, there are about three different readings per second. Capacitor C4, which is connected between pins 33 and 34 of IC1, compensates for the error caused by the internal reference voltage and also keeps the display steady. Capacitor C2 and resistor R1 together forms the circuit that does integration of the input voltage and at the same time prevents any division of the input voltage making the circuit faster and more reliable. Capacitor C1 forces the instrument to display zero when there is no voltage at its input. Resistor R3 together with reference control preset VR2 is used to adjust the instrument during set-up so that it displays ‘0’ when the input is zero. Resistor R4 controls the current that is allowed to flow through the displays (for decimal point) so that there is sufficient brightness without damaging them.
The IC, as mentioned earlier, is capable of driving four common-anode, seven-segment displays. Displays DIS1 through DIS3 are connected such that they can display all the numbers from ‘0’ to ‘9,’ while display DIS4 can display only digit ‘1’ (and ‘-’ sign when the voltage is negative). When TEST switch is pressed, test pin is pulled high (to V+) and all segments turn on to show ‘1888’ on the display. The TEST pin will sink about 15 mA under this condition. In the lamp test mode, the segments have a constant DC power supply. Pin 36 (REF HI) is made high through VR2 to adjust the reference voltage and pin 35 (REF LO) is connected to the negative terminal of the input. Preset VR1 is used to adjust the range of voltage divisions. Resistors R5 , R6, R7 and R8 connected to pin 31 are used for range selection. Switch S2 is two-pole, four-position (each ganged) rotary switch. Decimal point is connected to resistor R4 via rotary switch S2 for different range selection.
Check the related PDF.
Digital Voltmeter Kit DIY Kit
- Brand: KnS
- Product Code: KnS-Dig-Volt-Kit
- Reward Points: 5
- Availability: In Stock
-
रo 675.00
- Price in reward points: 500
Related Products
Digital Multimeter DT830B
The DT830B series multimeter is a compact, light tool - a bargain if you need something cheap and re..
रo 443.00
Digital MultiMeter Var Tech M830BZ
Specifications: DISPLAY: LCD, 1999 counts. DC VOLTAGE: 200m/2/20/200/1000V±0.5% ..
रo 285.00 रo 450.00
Digital Multimeter DT830D
Low cost Digital Multimeter DT830D Specifications DCV: 200m-2000m-20-200-1000V ±0.8% ..
रo 150.00 रo 450.00
Beetech MAS830L Digital Multimeter
The Beetech MAS830L Digital Multimeter Designed for basic electrical tests, the Beetech MAS830L digi..
रo 565.00 रo 829.00
Adafruit 575 Panel Volt Meter - 4.5V to 30VDC
Description:Put a voltage meter anywhere with this very handy display. This panel meter simply conne..
रo 760.00 रo 876.00

