ODROID-VU5A : 5inch HDMI display with Multi-touch and Audio capability
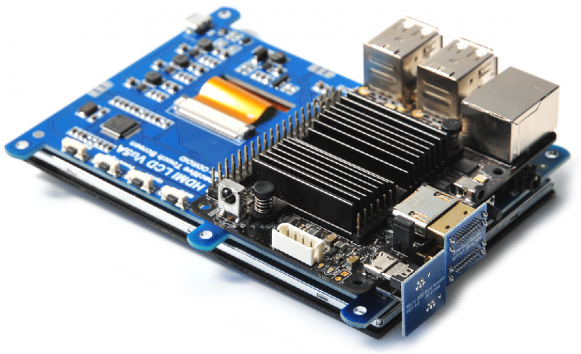
The ODROID-VU5A is your new 5-inch multi-touch screen for the ODROID-C2, ODROID-C1+ and ODROID-XU4 – with audio capability!
What’s new and different from the VU5?
* AUDIO JACK: The VU5A (Audio) is meant to be used with sound! Plug in your own speakers or earbuds/headphones into the audio jack (3.5mm)
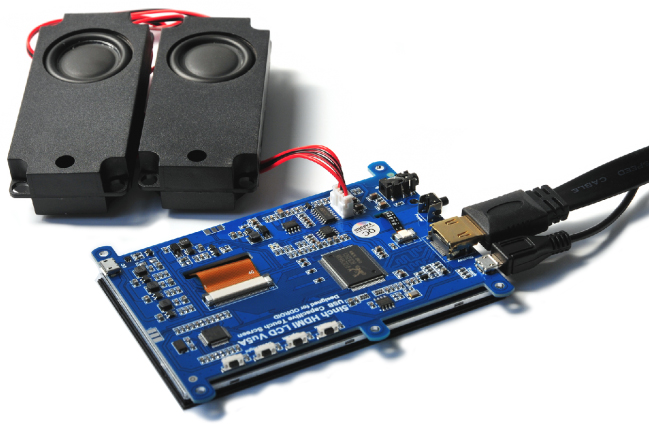
* AUDIO PORT: plug in the ODROID Speakers (affordable and powered directly from the board) into the audio port
* Additional microUSB PORT when you need more power!
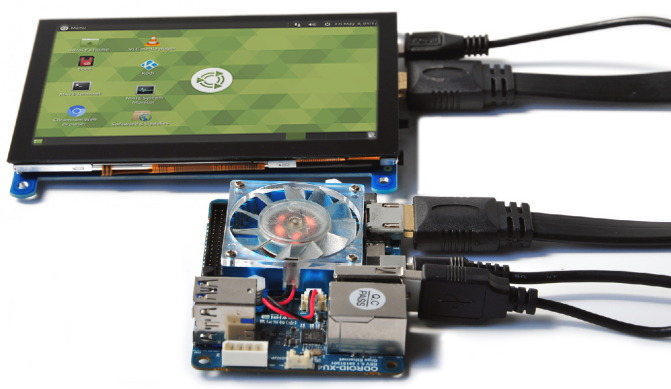
Connect the high quality 800 x 480 display to the ODROID-C2 or ODROID-C1+ via an HDMI link board and a micro-USB link board (both included) which handles power and signal. Then connect a DC plug on the C2 / C1+, once you install the latest OS update, and you are ready to play. Connection to the ODROID-XU4 is by HDMI and micro USB cables (both included) as shown below. This touchscreen is designed to work with both Android and Linux.
5-inch TFT-LCD
Screen Resolution: 800 x 480 pixels hardware resolution, configurable by software up to 1920×1080
5 finger capacitive touch input (USB ID 16B4:0705)
Power consumption : 500mA/5Volt
Power on/off tact switch
3.5mm audio jack and differential L/R speaker port to support HDMI audio output (only 48Khz sampling rate is available)
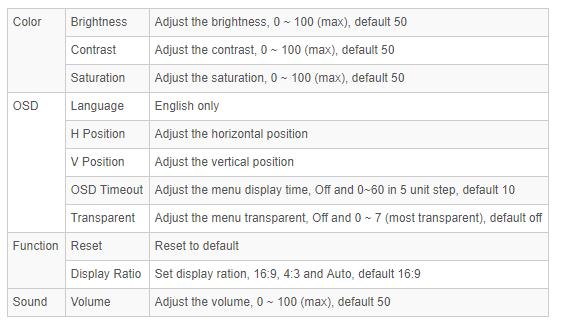
OSD menu supports with buttons for power management, brightness/contrast/volume adjustment, etc.
Wide Viewing angle (in degree) : Left 70, Right 70, Up 70, Down 50
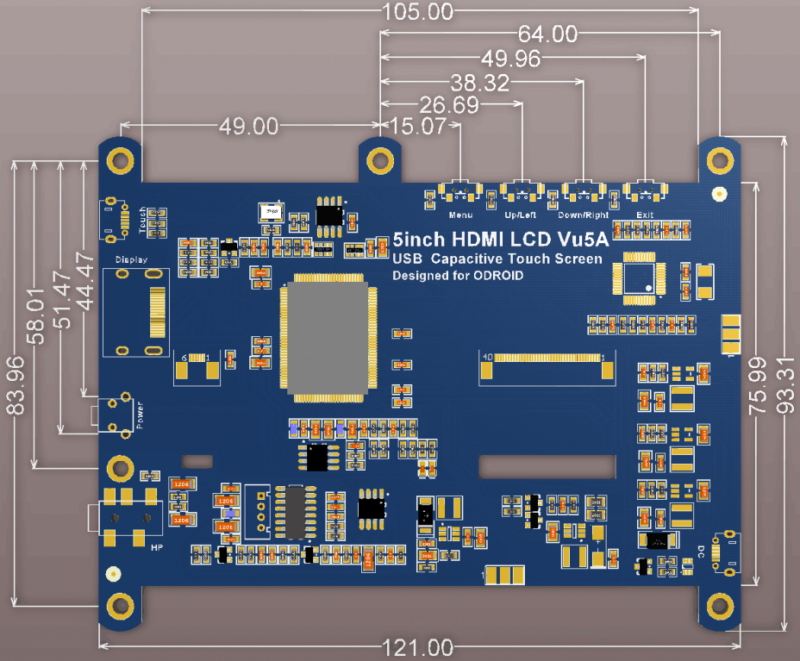
Screen Dimensions : 121 x 93.31 x 15 mm including buttons and connectors
Viewable screen size : 108 x 64 mm (active area)
WiKi : https://wiki.odroid.com/accessory/display/vu_series/vu5a/vu5a
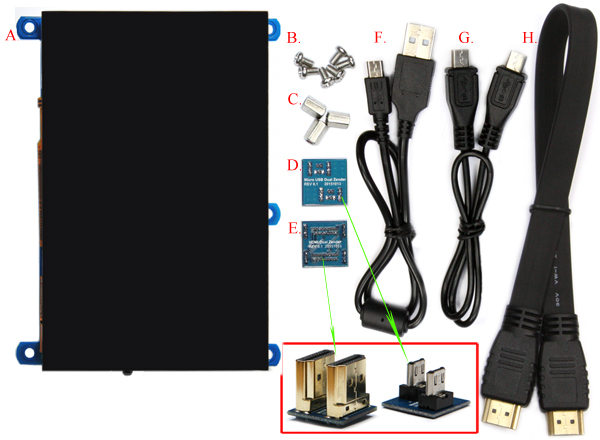
Package include
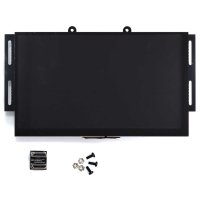
A. Fully assembled 5inch display
B. 6 x 3.5mm screws
C. 3 x Hex nuts
D. Micro USB link board
E. HDMI link board
F. Micro-to-TypeA USB Cable (approx. 35cm)
G. Micro-to-Micro USB Cable (approx. 35cm)
H. TypeA-to-TypeA HDMI cable (approx. 35cm)
Assembly Guide
Option 1 : Mount the C2/C1+ board on the LCD unit with 3pcs of 8mm PCB supporters. The HDMI link board and micro-USB link board are used for interface and power supply.
Option 2 : A Micro-to-micro USB cable and flexible flat HDMI cable can be used as well. The 35cm cable kit is included.
with ODROID-XU4
OSD Setting Menu
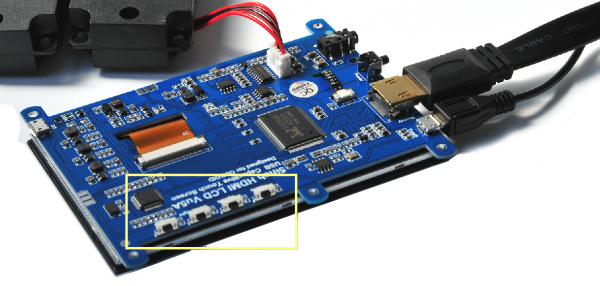
You can find four menu buttons on the upper side of VU5A.
Menu : To open the menu when using the menu and can be served as Confirm
Up/Left : Direction key
Down/Right : Direction key
Return : To return the upper menu tree and exit the menu
Connectors and buttons;
+ HDMI A port
+ Power on/ff button
+ 3.5mm audio out jack
+ Differential L/R speaker port
+ 4 x menu buttons
+ MicroUSB port: “Touch” – First attach your board (C2, C1+ or XU4) to the VU5A with an HDMI cable. Then attach the micro USB port next to the HDMI port labeled “Touch” to provide touchscreen power to the VU5A!
+ MicroUSB port type DC: “DC” – Using your speakers or any extra power consuming devices attached to your board, you may need additional power for stable performance. This micro USB port labeled “DC” is to provide extra power when you need it. Use any standard micro usb charger, like the ones used for most Android phones.
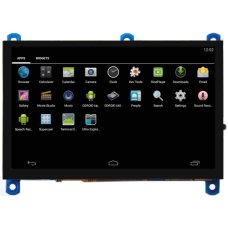
The Chromium browser supports the multi-touch pinch- zoom gesture, so you can enjoy the zoom in and out like a smartphone. The touchscreen also works with Android OS for the C1+.
Touch the sound!!
Note:
The supplier of the product has no replacement and/or refund policy as part of their product warranty/guarantee. Furthermore, the repair cost and the cost of shipping to and fro from South Korea has to be borne. As Fab.to.Lab is merely an intermediary we extend the exact same warranty terms to all customers of Harkernel.
Please find more details here: Supplier warranty terms and conditions: https://www.hardkernel.com/agreement/
Known issues.
1. The display shows noise on the screen in the boot process and power-down process because there is no off-sync filter circuit.
2. On the C1+, there will be after-image or noise when the system turns off if you use the OTG port.
To fix this issue, you must remove(de-solder) the R94 from the C1+ PCB.
If you have the C1+ PCB Rev 0.4 2015/09/30, just remove a JUMPER on J8.
3. There is no backlight control except for the slide switch. So software can’t adjust the brightness neither turn on-off the backlight.
First booting will generate the boot.ini file automatically.
You can edit the boot.ini on your PC if you connect the SD/eMMC card after first booting(self-installation process). Change the vout mode to “HDMI”.
ODROID-VU5A : 5inch 800x480 HDMI display with Multi-touch And Audio Capability
- Brand: Hardkernel
- Product Code:Hdk-VU5A
- Reward Points:72
- Availability:In Stock
- रo 7,232.00
-
रo 6,575.00
- Price in reward points:7232
-
- 2 or more रo 7,173.00
- 4 or more रo 7,143.00
- 10 or more रo 7,113.00
- 18 or more रo 7,053.00
Related Products
Tags: Touchscreen, ODROID, XU4/XU3, C1/C1+, VU5A